Tone chasing origins
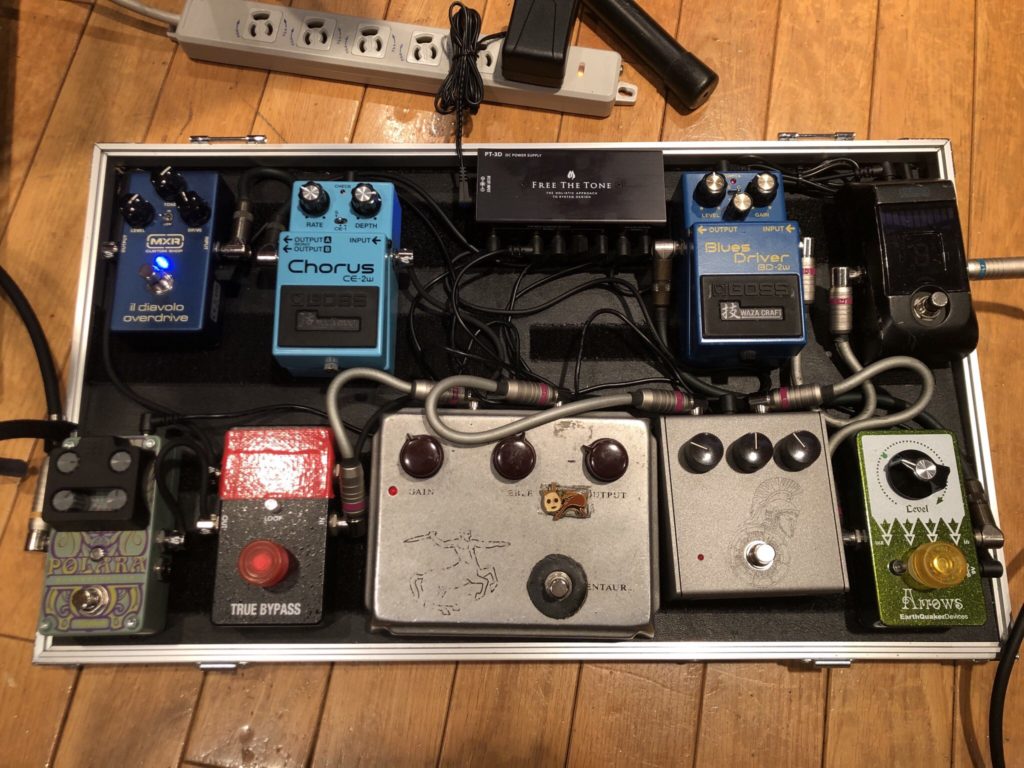
I set out to build the Klon Centaur pedal after a comment about Hisako Tabuchi from Number Girl’s tone by my girlfriend.
At that time, I didn’t know much about pedals and simply chose the rarest pedal among her known gear.
Turns out this pedal has a very strong following in the community, it was a good starter pedal build for me as well.
Being a widely coveted/discussed pedal, there was a plethora of quality articles and discussions on it online. These two in particularly carried me through the entire build and helped me understand the Klon’s circuit. Definitely worth a read.
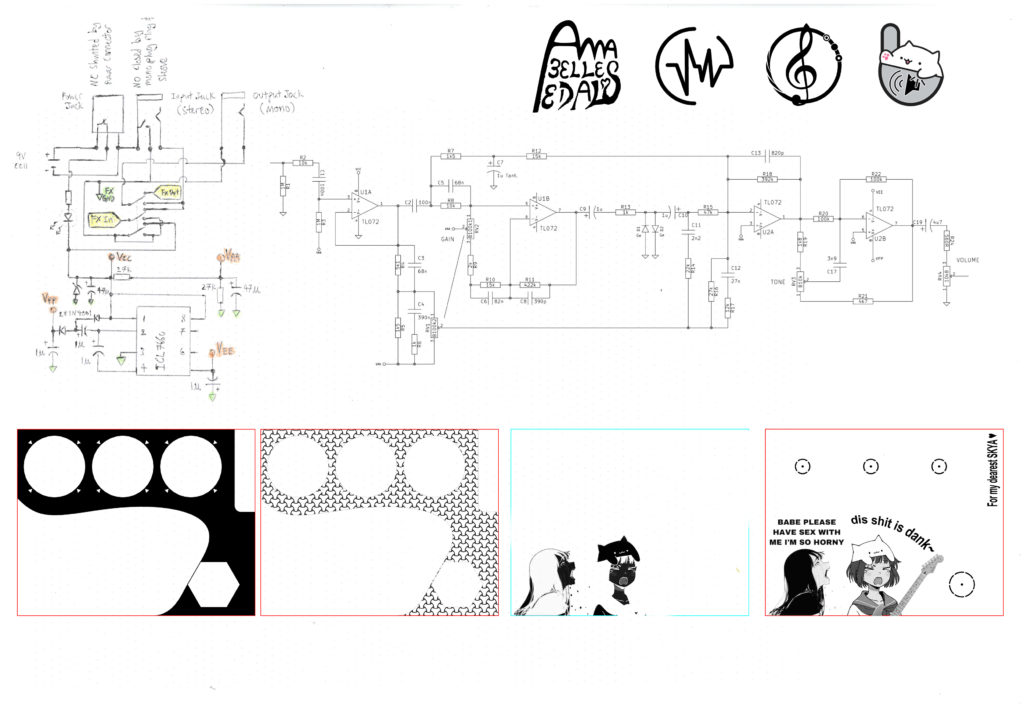
The next bit was understanding how the standard pedal wiring works, stereo jack in and dc plug shunt terminals, 3PDT wiring, etc. Nothing complicated just details that have to be ironed over and sorted out before the build. With that down and the circuit schematics on hand, I first did a preliminary sourcing of components just to have an idea of component pitches and size in order to design the PCB. Skipping all the boring bits, I finally sent the gerber files to a PCB fabricator in China and a month after embarking on this project I had a PCB to start work on~!
Build process
Element 14 really let me down this time, I make a point of buying components which are in stock and available but my entire order took 3 weeks to arrive due to several parts being delayed.
Populating the board was easy enough, I should have left a bit more space for several capacitors and had their pads staggered as some capacitor leads came frighteningly close to the resistor leads. This was remedied by using heatshrink to insulate those sections of exposed lead before soldering to the board.
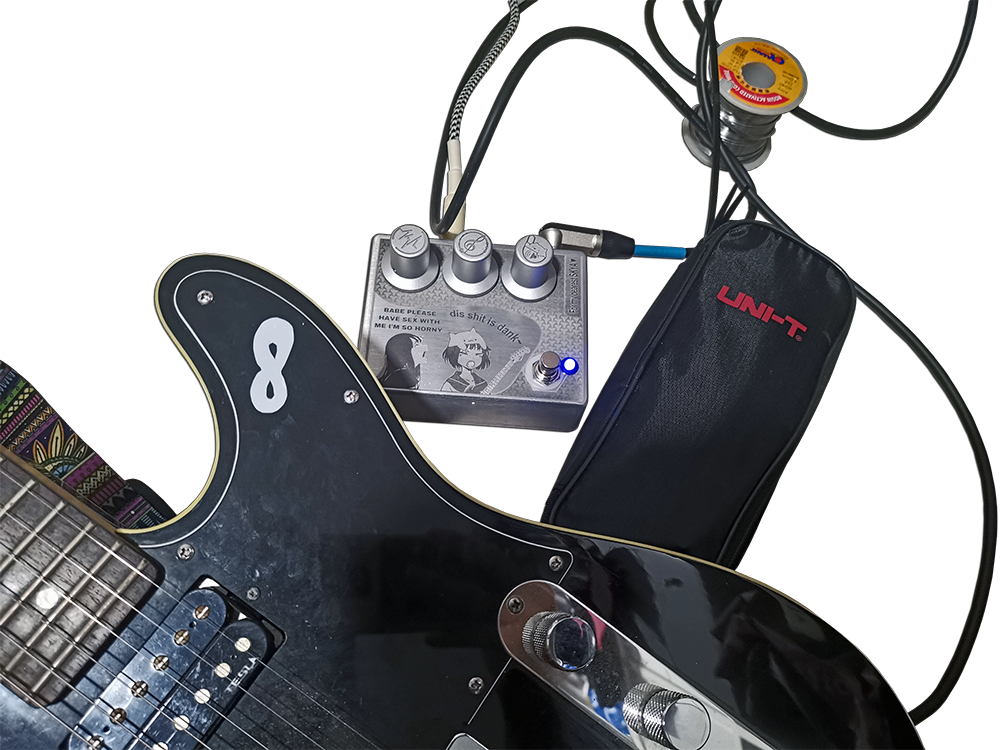
I drew up a tessellating design meant to add visual texture to the enclosure as I decided to do an all raw aluminium casing with laser etched designs.
Laser etching aluminium has the possibility of leaving white etch lines or deep black etch lines; and almost every tone of grayscale in between. You achieve this through control of the laser power, frequency and speed. I used a piece of scrap aluminium to verify the settings before work on the actual piece.
Three etching stages were used:
1) Maximum powered deep etching for patterns and text
2) fast low power etches for whites
3) slow medium power etches for blacks
Drilling was simple, aluminium is a treat compared to the stainless steel I usually work with! A conical reamer is a must! Cleaning up the holes and leaving a smooth bore just feels so good. This pedal being a gift, I just had to do her right.
Pity I ran out of thin gauge wire halfway and decided to use a roll of wires that I had in my work bag. They’re a little thick but there was plenty of space anyway.
Wired her up and she hit the ground running 😊
THE NEXT STEP, LTspice simulations:
My Klon Centaur has a lovely sound and a very varied range when playing with the gain and tone dials. It sounds great on the guitar but when I ran my bass through it, not so great. Hence I started discussing with others on online forums and took note of the modifications that they did to their Klon builds to create a “Klon for bass”. I had to do a review of my electronics knowledge and still felt inadequate in terms of being able to look at a circuit and deciding if lowering the frequency of this high pass would give me the sounds I wanted or not. The idea of building a breadboard Klon was tempting but even more tempting was a way to simulate pedals digitally, partly motivated by the fact that my CRT oscilloscope is really old and I don’t care to mess with it.
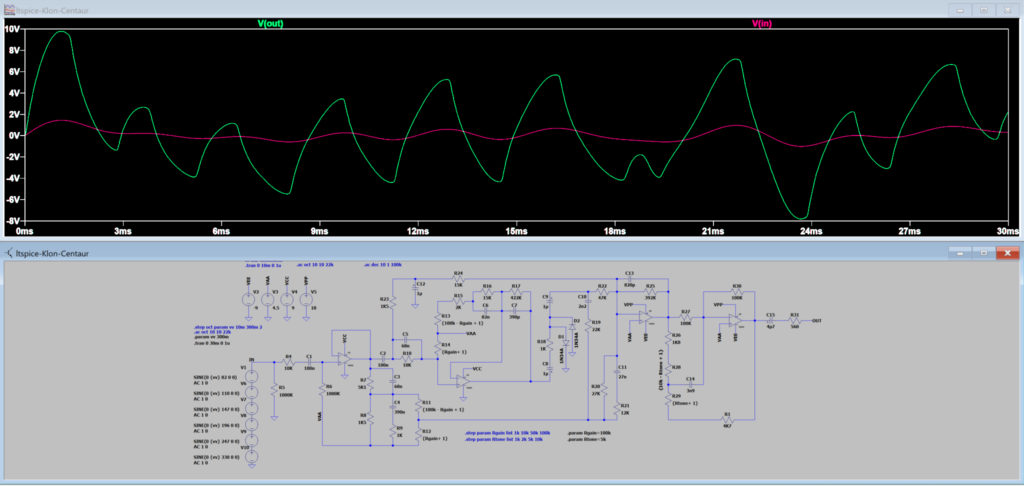
Learning LTspice only took me an afternoon, which speaks volumes of its ease of use. There was a need to manually add components to the libraries but this was simple and fuss free. After drawing up the circuit, doing several simulations and comparing bode plots and output waveforms with the material available on the net, I was satisfied that this circuit was performing as a Klon pedal should. At this point, I was using either a single AC source and sweeping the frequency or potentiometer values. Or stacking 6 frequencies corresponding to EADGBE on the guitar to simulate the waveform when strumming all open strings on the guitar. I was still lacking an intuitive way to interpret the circuit!
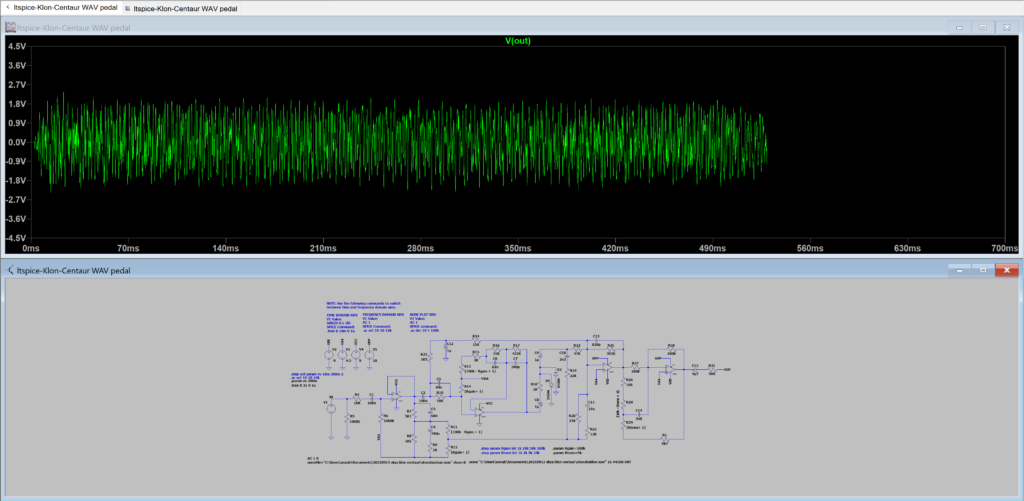
After some reading up, I learnt LTspice could accept a WAV file as AC input and also output the results of a voltage probe into a WAV file. It is as simple as referencing the input file location and then using the .wave spice directive to output a file to specified location.
With great excitement I hit simulate>run>V(out)
>w<
And she cooches!!!
Albeit slowly, at a rate of 20ms/s but still! YAYY~
[🡻] Clean WAV file (修羅場 – 東京事変)
[🡻] Modified to LED clipping diodes
[🡻] Stock Klon circuit (Gain 1, Tone 0.5)
[🡻] Modified to schottky clip diodes
Finally, I can hear the circuits I’m building. Though this will differ from real world builds without a question, it will work well to indicate the type of differences that can be expected from each component tweak or circuit modification. Listen to the above files! They demonstrate well the differences between germanium (stock) diode hard-clipping, LED hard-clipping and schottky diode hard-clipping. Diodes used are 1N34, red 5mm LED and BAT54 respectively.
Naturally, I now proceeded to meddle with the Klon spice model in an attempt to achieve my “BASS KLON” dreams.
[🡻] Clean
[🡻] Stock Klon
[🡻] Modded Klon
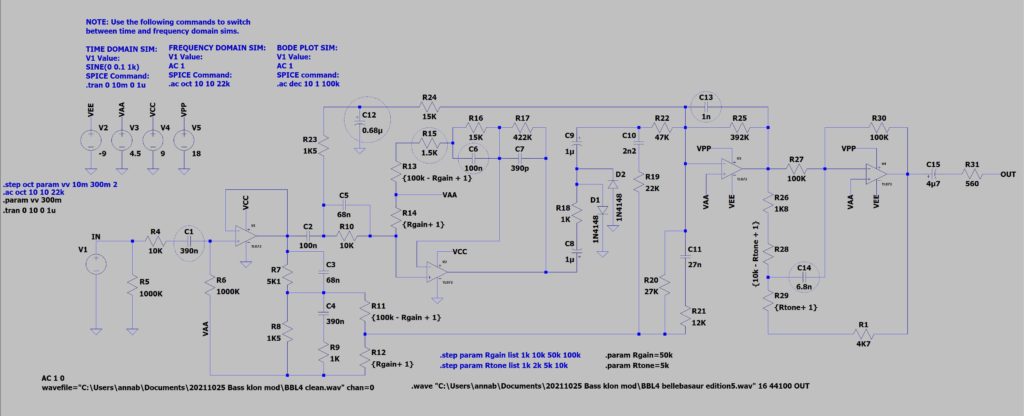
Circled parts are modified parts. More bass, less mids, but it also sounds muddier as a result, also a lot more fuzz due to increased gain offset and different diodes.
I honestly can’t say that I’m too pleased nor proud of this. I don’t see myself building a Klon for the bass anytime soon until I have a circuit that is deserving to be actualised.
Thank you for reading. This post is done now.
Download my Klon Centaur SPICE file here! ⤓

“You can tune a piano, but you can’t tuna fish.”
— REO Speedwagon


